Introducing the Rise Graphic
Our Rise Graphic element is designed to uplift, energize, and signal better days ahead. As a natural extension of our logo, it reinforces our brand narratives, signals continual upward movement, and speaks to our positive influence and impact on people’s lives as they use our products.
You can see here that the Rise Graphic is designed to be flexible to suit a variety of layout and content scenarios. You’ll find additional information on how to use it below.

The full Rise Graphic artwork is never visible
Always place and crop it following the guidelines on this page.

Minimum crop
At minimum, crop the Rise Graphic to the width of the shortest curve so that the downward stroke is not visible.

Maximum crop
At maximum, crop the Rise Graphic so that only the central third is visible.

Minimal crop
You can also center the Rise Graphic on the edge of a layout and crop it so that only the left half shows.
When using the minimal crop, always center the Rise Graphic on the right side of a layout and anchor the curves' corners to the bottom edge of the layout so that the downward stroke is not visible.

Linear treatment
The Rise Graphic starts with the linear treatment in our graphic library. Do not alter its line weights, which are as follow:
- 1pt, 2pt, 3pt, 4pt for formats with the width up to 2048 px (print materials up to 10” wide).
- 2pt, 4pt, 6pt, 8pt for formats with the width 2048 - 4096 px (print materials 10-20” wide).
- 4pt, 8pt, 12pt, 16pt for formats with the width 4096 - 8192 px (print materials 20-40” wide).
- If you need additional sizes, continue to double line weights each time your application size doubles.

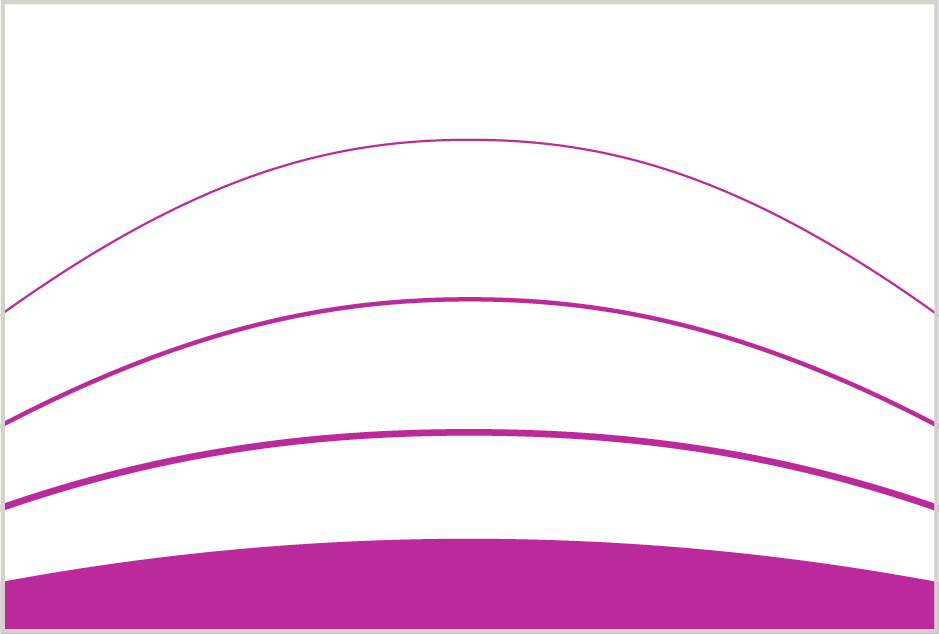
Linear with bottom fill treatment
To apply this treatment, follow these easy steps.
- Start with the appropriate Rise Graphic for your application size.
- Select the lowest curve shape and swap it from outline to fill (Shift + X in Adobe programs).


Linear treatment
Apply the same color to all four lines in the Rise Graphic. We recommend the following color combinations:

Use white lines on any color from our palette.

Use any color from our palette for lines on white backgrounds.

Use any color from our palette for lines on backgrounds from the same family to create a tone-on-tone feel.

Use any color from our palette for lines on backgrounds from the same family to create a tone-on-tone feel.
The filled bottom shape can be the same color as the lines it is used with.
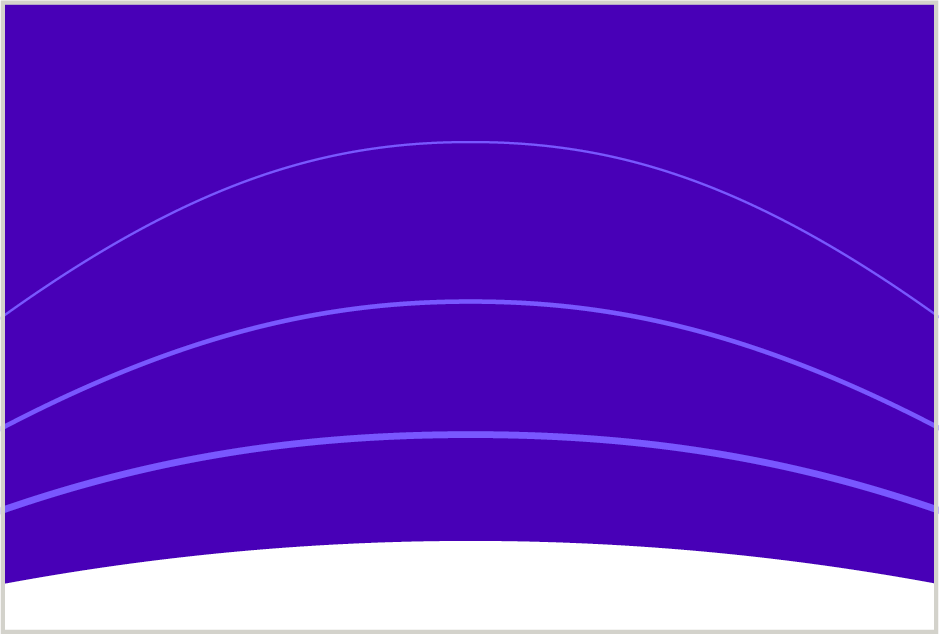
The filled bottom shape can be white even when the lines are another color, as long as it is used on a color background.

Transparency with photography: use a color family present in the image.

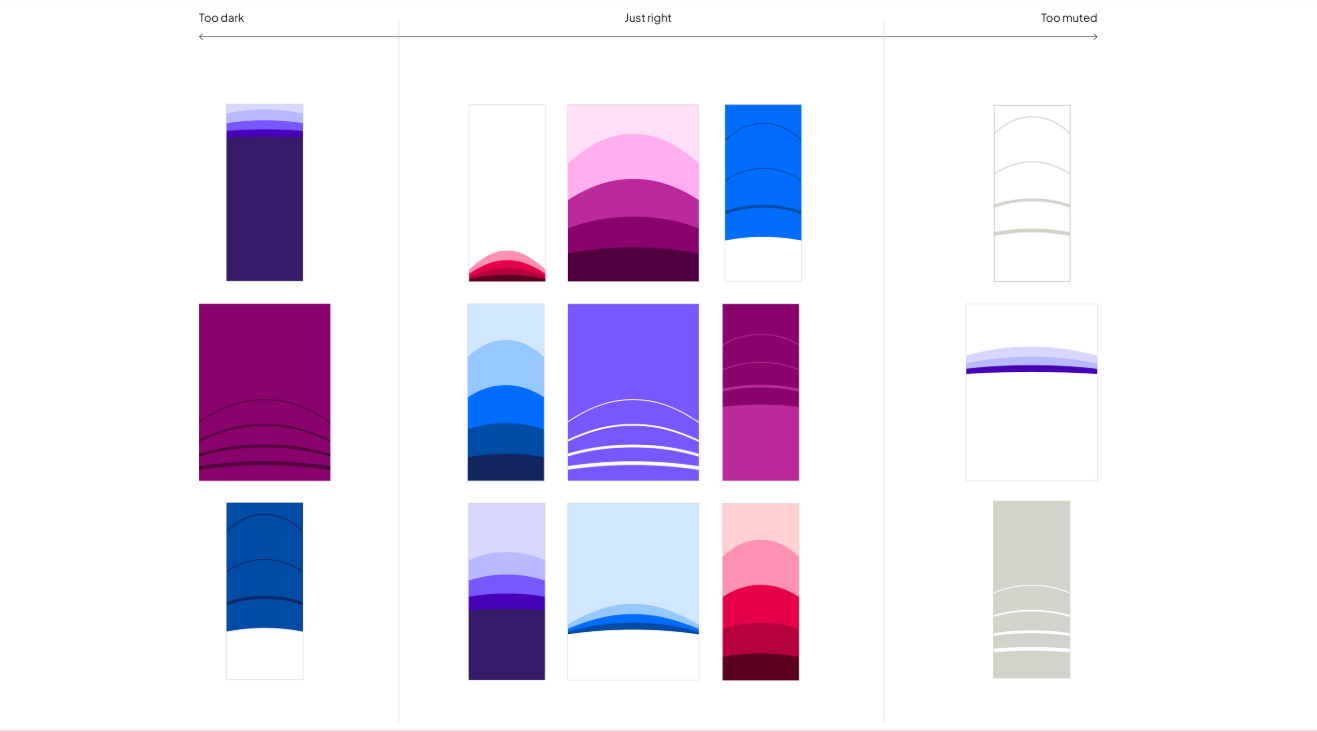
Strategic considerations for color use
Use these examples as a guide when applying color to layouts, to ensure that our brand is always vibrant, bright, and energetic.
Step 01
Place, stretch, and scale the Rise Graphic as needed so that its curves sit where you want them.

Step 02
Using the direct selection tool, grab the bottom corners of the Rise Graphic. Drag corners off the bottom of your application while holding shift.

Step 03
Apply color to desired treatment. See previous section for guidance.

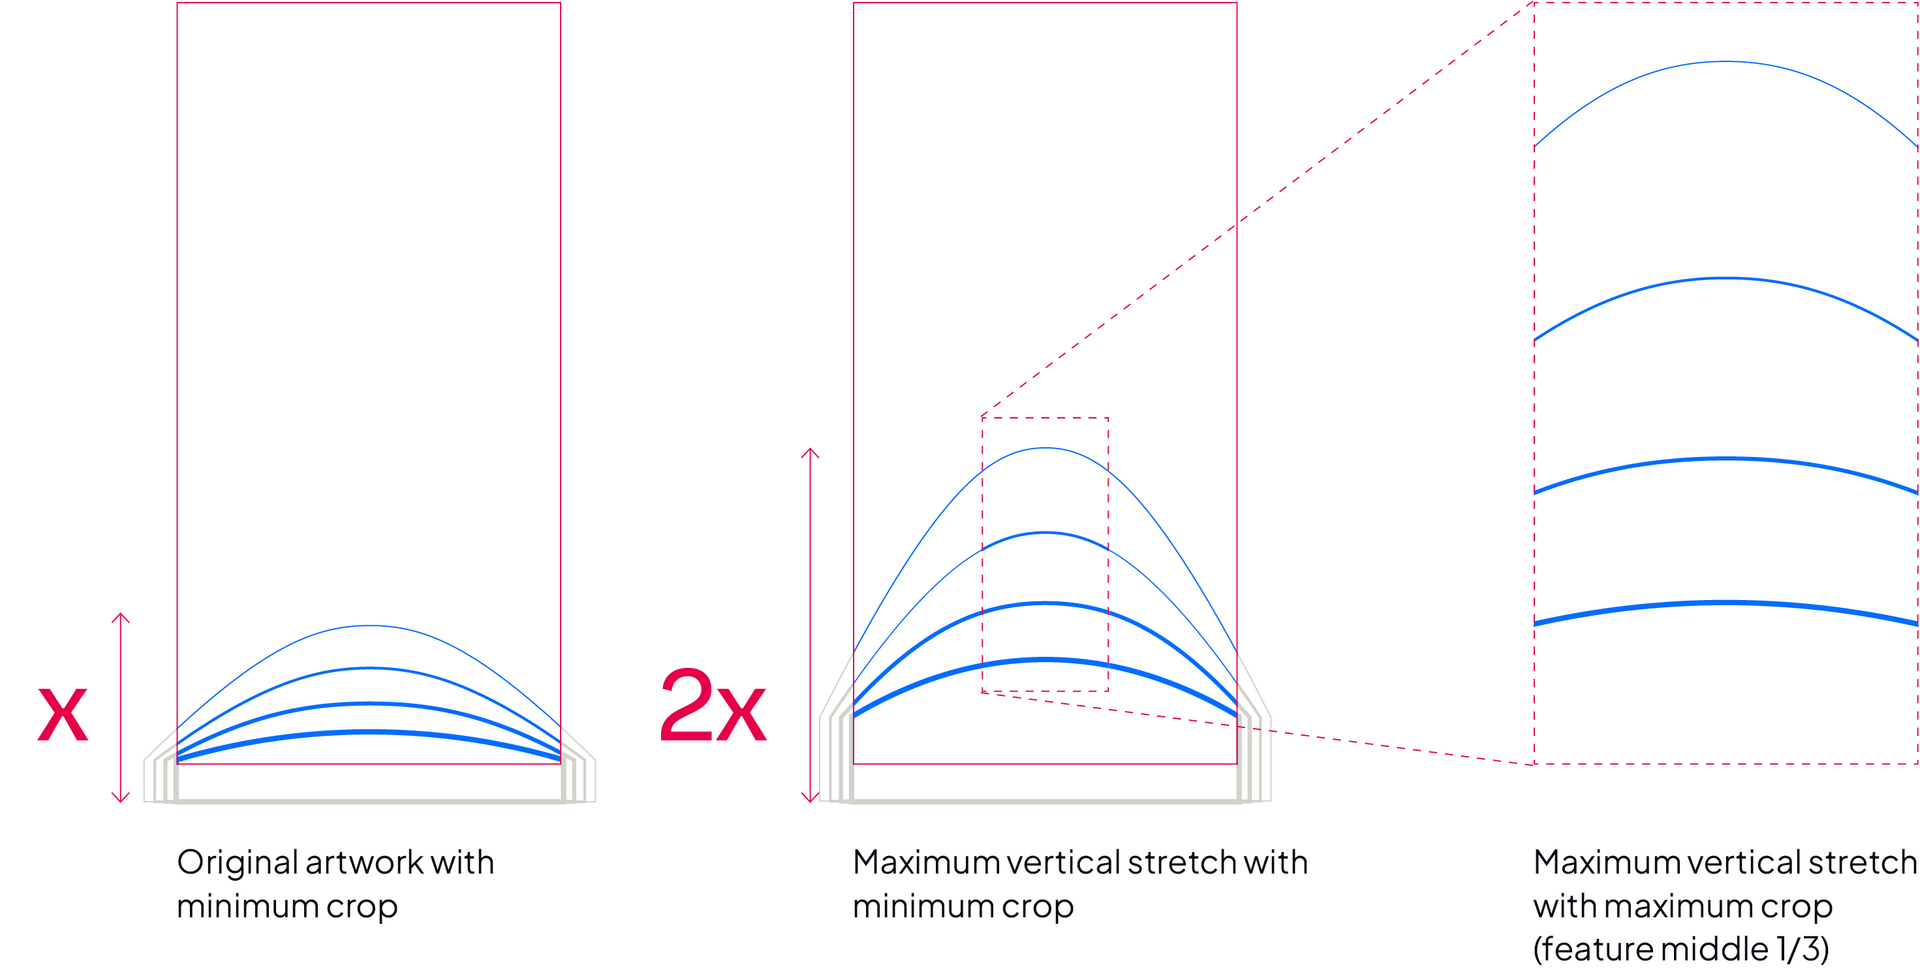
Stretching the Rise Graphic vertically
After placing and cropping the Rise Graphic, you can stretch it vertically up to 2x its original height.
This treatment works best for vertical formats that can be cropped to feature the middle third of the Rise Graphic.
Stretching the Rise Graphic horizontally
After placing and cropping the Rise Graphic, you can stretch it horizontally up to 4x its original width. This treatment works best for minimal treatments that span the full width of an application.

Misuses
Avoid these potential mistakes when applying our graphic elements to layouts.

Don’t stretch Rise Graphic more than 2x vertically.

Don’t alter the line weights.

Don’t use more than one color in linear treatment.

Don’t use more than one color family in a filled treatment.

Don’t change the order of light to dark in the filled treatment.

Don’t cross background colors in a filled treatment with type.
Rise Graphic files for professional use
The Rise Graphic is a central element of our evolved brand identity. To present as one Resmed with a cohesive and consistent visual presence, the Rise Graphic should be used only by experts on the creative team and external agencies who are most familiar with the specifics of its design and implementation.
The files are downloadable as EPS and SVG and may require professional design software for proper implementation.